
Learning how to make fairy houses is so fun and rewarding. The easiest material to make a fairy house is with oven-baked clay, but concrete and wood fairy houses, although not as quick, can be just as fun. Here’s how I made my own fairy houses.
Take a look at my fairy houses for some inspiration. And I will tell you how I made each one.
My Fairy Houses
If you’ve been following, you’ve probably realized I am fanatically obsessed with fairy gardens. I’ve built so many fairy houses, I have them coming out the wazoo! If you love crafts, it’s pretty easy to build your own DIY fairy houses. They’re such a fantastic, and EASY addition to a fairy garden. Little landscapes where tiny people live. Even entire fairy, gnome, and sprite villages. I mean, come on. How cute is that?
Clay Fairy Houses
Clay fairy houses are easily my favorite because they’re so tiny and quick. The quicker the project, the better! I’m all about instant gratification. Oven bake clay is easy to work with, especially if you have a toaster oven! You can get super creative with shapes, and they only take a few minutes each once you get the hang of it.
Shape your clay in the form of a tiny house. Insert a support wire in the bottom. Bake. And paint. Its that easy, but I’ve described the process below.
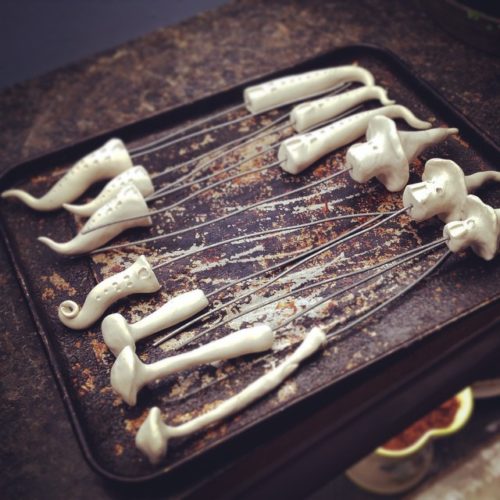
I used the original Sculpey oven bake clay. I created my little masterpieces, then carefully drove a piece of 16 gauge wire (from the hardware store) into the bottom so they would stick in the soil. I pushed the wire as far as it would go without ruining the piece. The instructions for baking is 275 for 10 to 15 minutes. It’s a very quick process in a toaster oven because you don’t have to preheat. You can cover your toaster oven pan with tinfoil if you don’t want to be eating clay later.
Some tips. Be careful to smooth your work before baking. Fingerprints in the clay look pretty bad in finished pieces. Try different tools for making different style doors and windows. Pencils, exacto knives, curled wire. I looked on pinterest for never-ending ideas.
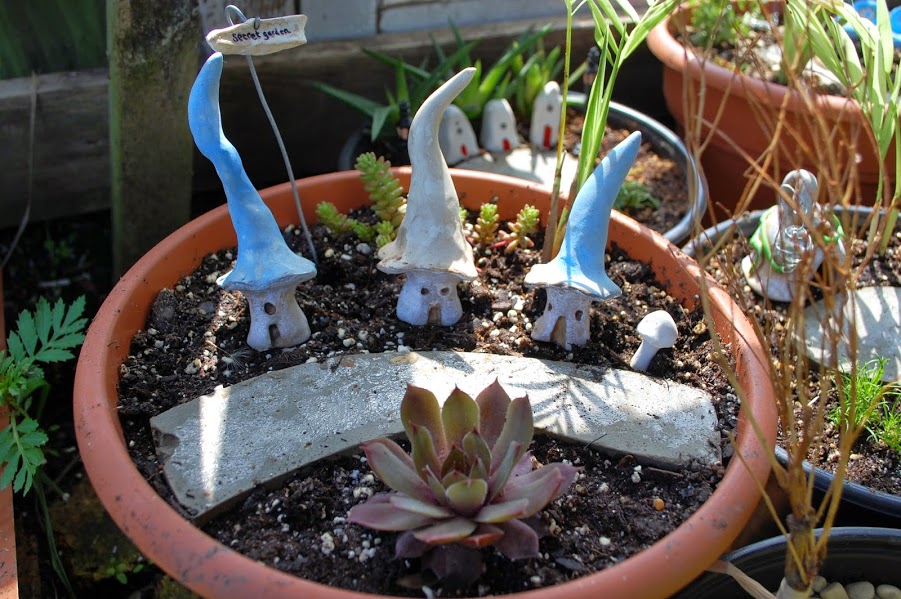
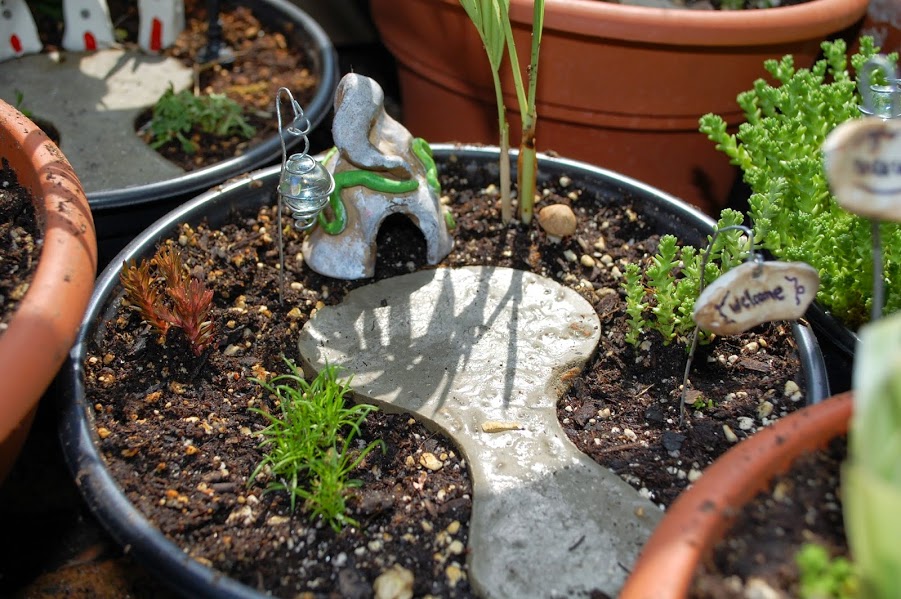
After the pieces are baked, you can go nuts with acrylic paint. My favorite method was to water down brown acrylic paint to a watercolor consistency. Wash it on very messily with a paintbrush. Then blot sections of it off with a paper towel. It creates an awesome aged look.
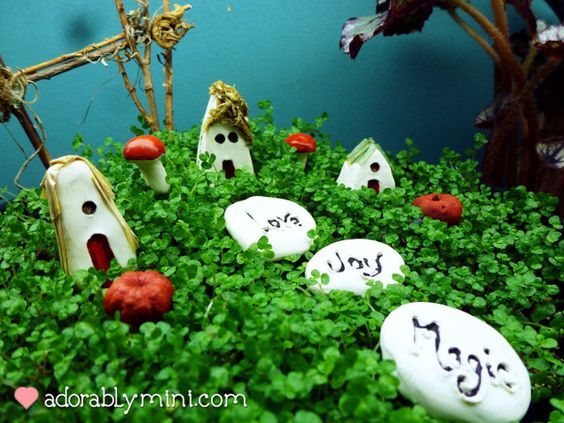
After the brown paint drys, Go over it with a wash of white paint, and blot again. Paint your windows and doors different colors. Glue on some moss, raffia, bark, whatever you have! Then start building your little fairy world. Signs and stepping stones with cute little sayings are just as fun.
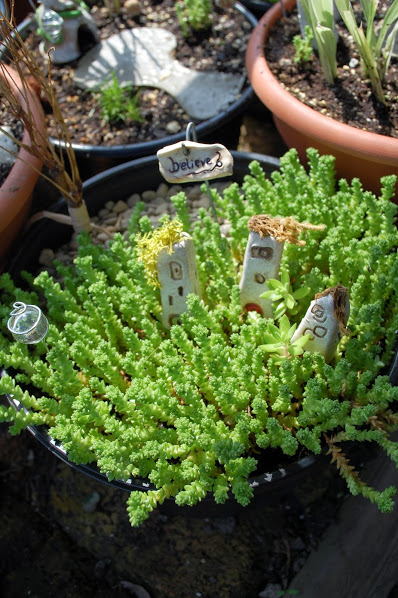
In the photos below, I carved a word into the clay with a pencil before baking. After baking, I retraced the word with a fine point Sharpie permanent marker.
I was thrilled with my fairy house results. The more I worked on them, the better they got. Since they only took a few minutes to shape, it went fast.
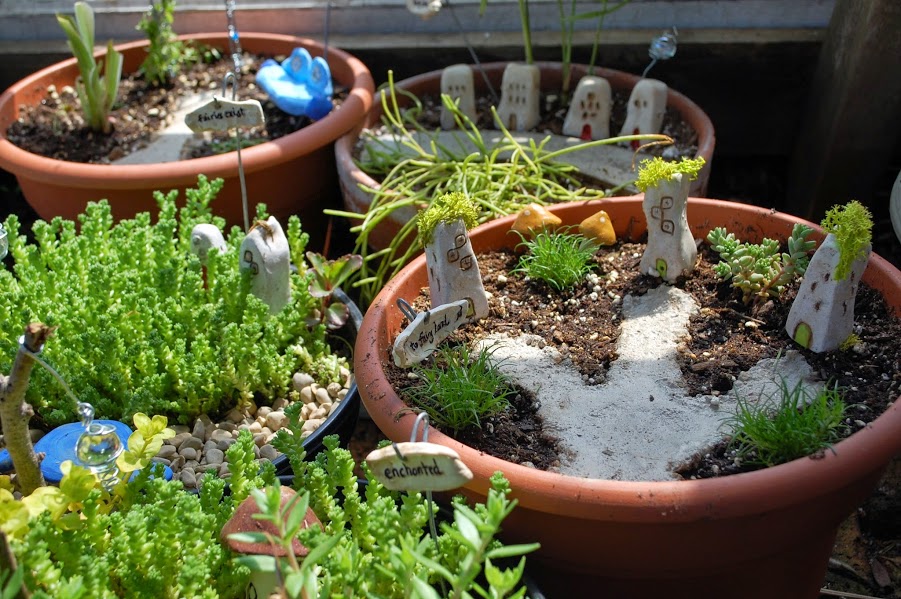
Clay fairy houses are so easy and quick, with just the right amount of creative touch. I know you can make these yourself. They are also quite inexpensive to make. All you need is clay, some wire and whatever tools you have laying around.
Concrete Fairy Houses

I go through project after project here at the nursery. The creative force is STRONG! I had already been making concrete pots, so I had some experience and lots of concrete. When the fairy obsession hit, there was no way around trying a few concrete fairy houses. Foam won first prize for making forms. It was more crafty than constructive, so that was a major plus. (hint, pull out your hot glue gun)
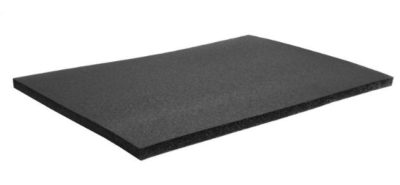
First I cut 3″ wide strips of foam. I eyeballed the length. I bought high density black foam at least 6mm thick. If you’re building larger houses, you might also glue your strips double thick to get the rigidity you need to keep the walls straight. Foam is important because it holds concrete nicely, and it bends without tearing so you can get your house OUT of the form after it sets.
You’ll be thrilled at how easy creating a concrete form turns out to be. I found an old board as a base. I grabbed my 3″ foam strips and hot glued them, on their side, to the shape and size that I wanted my house to be. It was SO easy. You’ll have dozens of them before you know it.
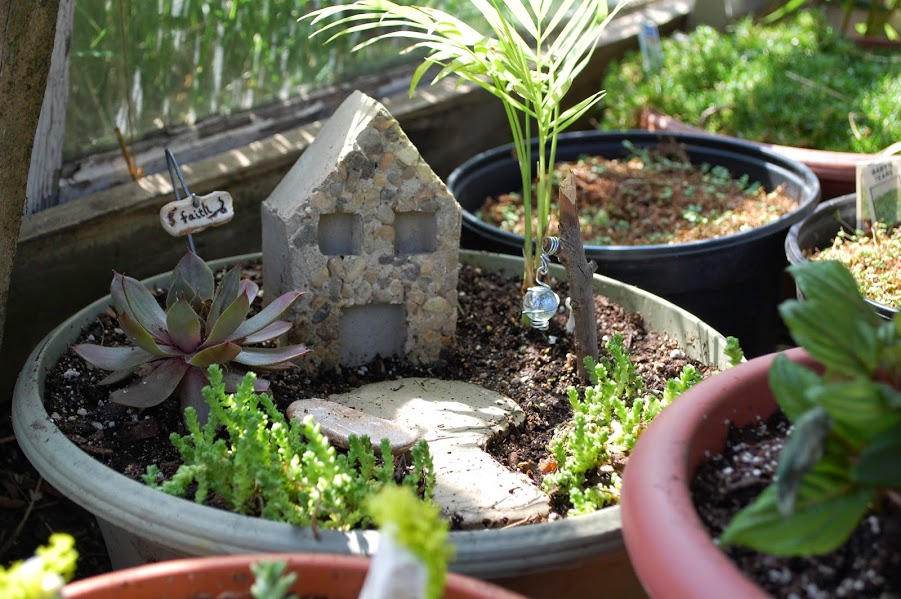
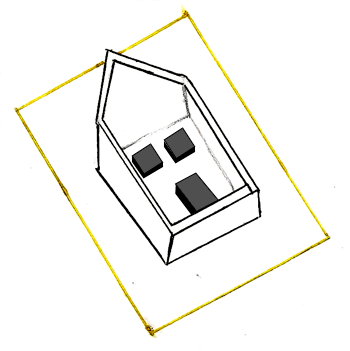
For door and windows, I cut the foam into squares and glued them to the board, inside the form. I wanted deeper windows and doors, so I stacked and glued two pieces together to get the thickness I wanted. I poured a thin layer of pea gravel into the bottom of my form for a stone wall. Then, I mixed and poured the concrete into my form. Let it set up completely before taking it out. The concrete will usually pull the door and window foam out with it. Simply peel them out and stick them back in the form.
Since my foam form (say that 3 times fast, foam form, foam form, foam form) is buried somewhere in the garage, I drew a diagram of what it looks like. You can build any shape or style with foam. Because it’s flexible you can let your creativity go wild! Create round hobbit houses. Design whimsically angled walls, doors and windows.
When they’re done you can finish them off with more crafty ideas… paint them, glue on gorgeous moss, add fake flowers, glue on wooden roofs or doors. So many possibilities.
Wooden Fairy Houses
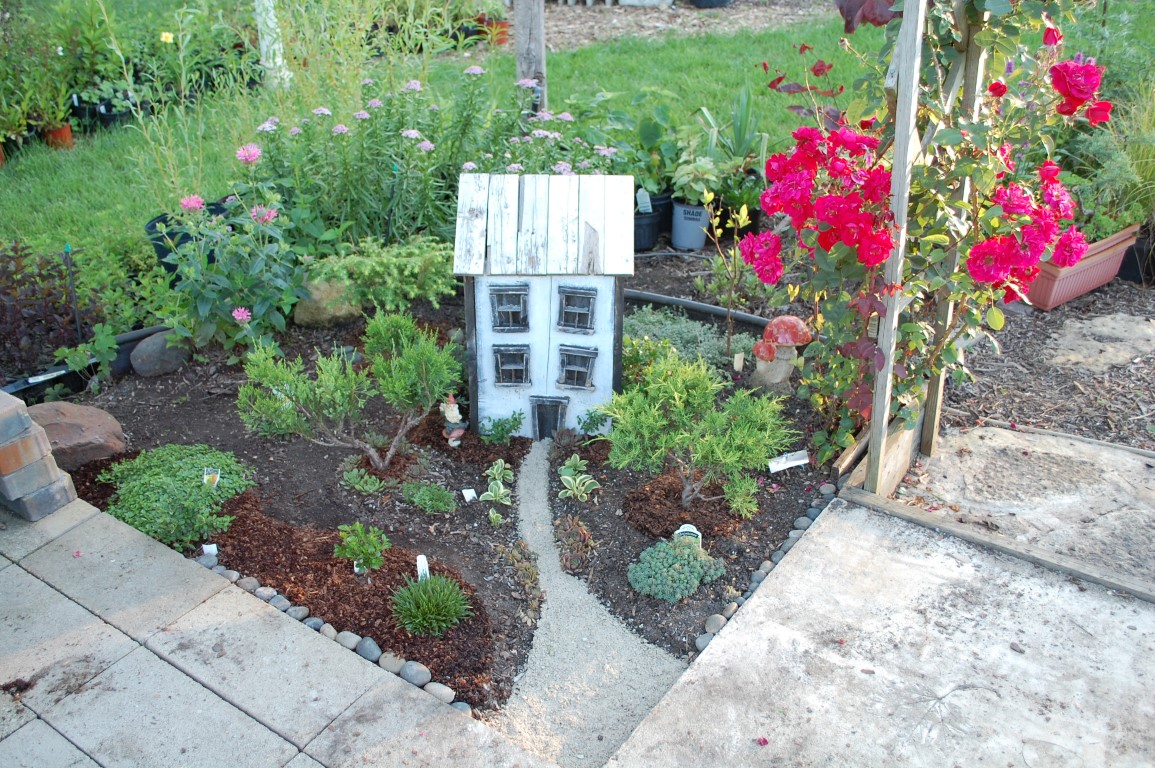
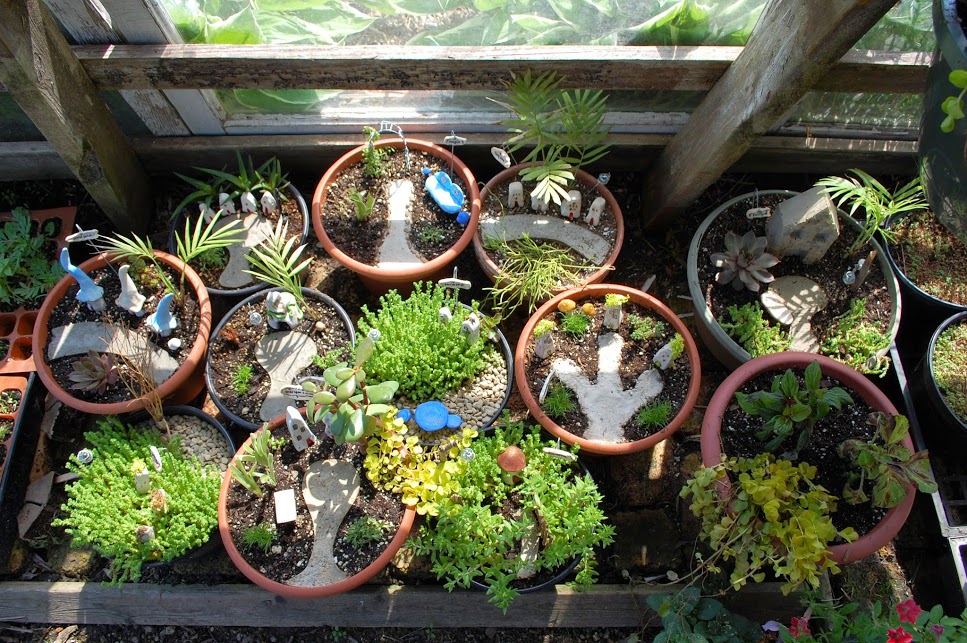
Wooden fairy houses are so strikingly beautiful, but the most time consuming. It’s definitely a construction project. For my outdoor fairy garden above, I wanted something large to fill that space nicely. I had a bunch of salvaged wooden shelves from an old shoe store. They were aged from being outside which was great, but I still did a lot to the finish.
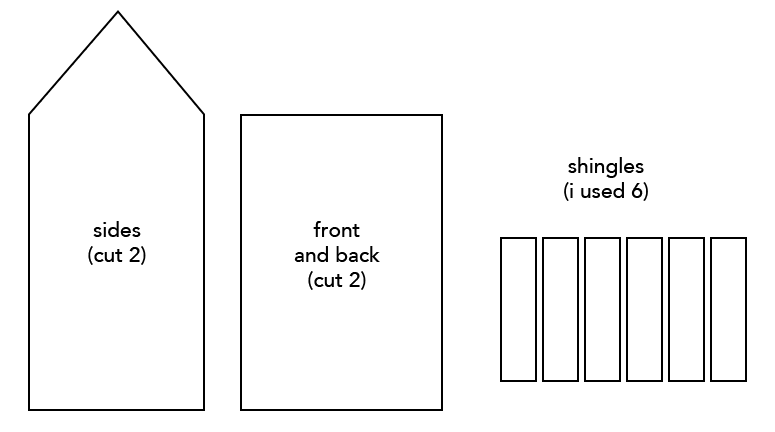
I designed and marked the boards for the cuts. I needed 2 sides with angles for a roof. One front. One back. Then, roof shingles. It was really easy to eyeball the measurements. Angles aren’t super important. I just made sure each opposite side matched. This is easy as cutting one board, tracing precisely and cutting a matching board.
To get a nicer aged look, I painted all of the boards black (except for the roof). After the black paint dried, I sloppily painted over with white. I wanted some of the black show through. The side boards were left black.
When all the paint dried, construction began. The sides were screwed onto the front and the back. I inserted the front and back boards (white), between the sides, so that nice black side edge shows from the front. Then the shingles were secured on top with a nail gun.
The windows and doors were the most meticulous part. I cut tiny pieces of the same board with a small hand saw. Then painted them black, let them dry, and sanded the edges to age them.
I glued them on the front of the house with Gorilla Wood glue. It’s important to use this glue and not cheap out if you want this baby to weather the outdoors. UPDATE (2018): I’ve tried a lot of glues and I have to say, I’m so impressed with this glue. We’re going on our third year and it’s held up beautifully. I’ve left it outside, right where it is for 2 winters!
After I glued the windows, I painted inside of the windows black. The little cross sections in the windows that replicate window panes are popsicle sticks of all things! I’m also impressed with how the Gorilla wood glue held these thin little thing in place for all this time.
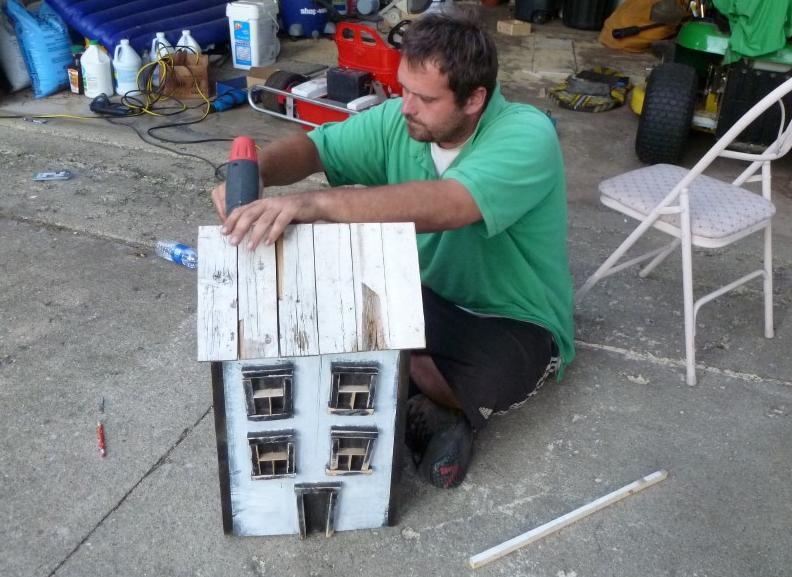
To top it off with a roof, I scraped some paint off the shingles, and had Jon nailgun it all together. It turned out to be a half day project but it was really fun, and totally worth the effort. For years, our fairy house has been outside and holding together nicely.
The sky’s the limit and you’re only bound by your creativity. I hope you try some of these fairy garden houses and share photos of your work in the comment section below! Have fun!!!